
Summary: The Intake Forms feature, unique to Ziflow, allows your designers, customers, and stakeholders to submit proofs directly into your account using a simple link and have a workflow automatically assigned to that proof.
You can create as many intake forms as you need in just a matter of minutes, each with its own customized branding, title, description, as well as upload options, and custom properties.
Our intake forms handle not only file & website submissions but also text, which we’ll automatically convert to a PDF for review.
Available: on Standard, Pro, Business Legacy, and Enterprise editions.
Features outlined in this article:
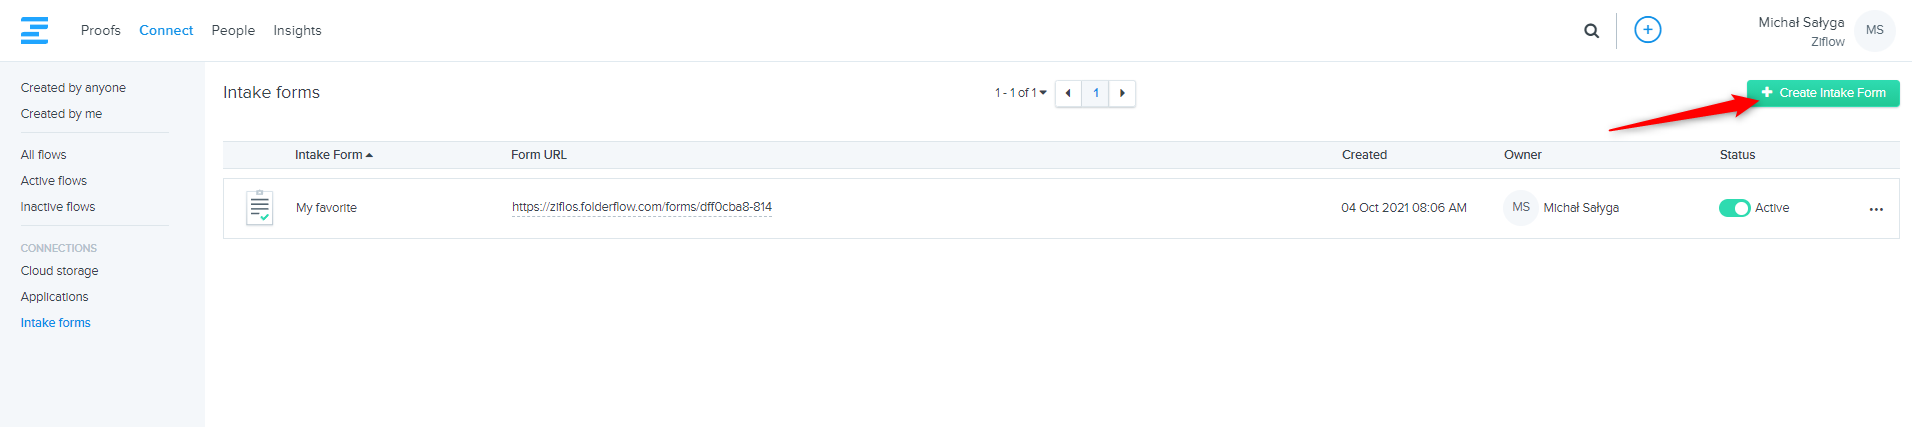
Creating Intake Forms
Click on the Create Intake Form button.
Once you click the button, a new intake creation form will be displayed. Fill out all necessary fields and press Create Intake form once you are done.
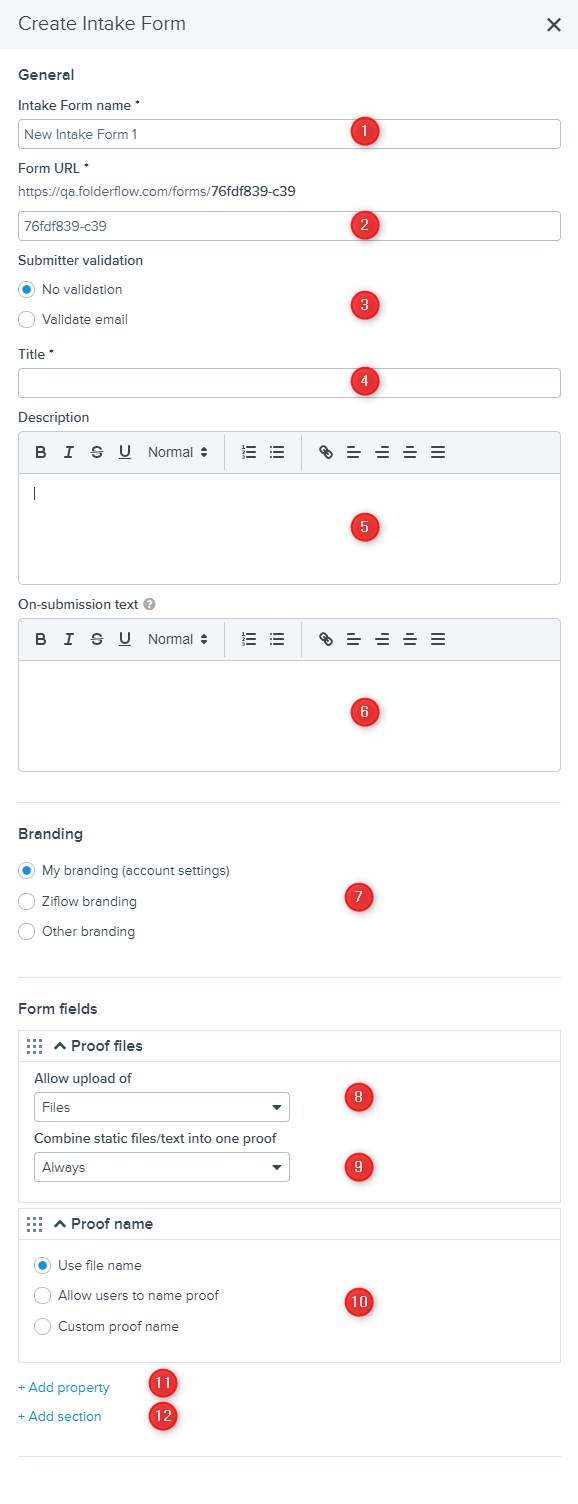
Intake form name - that is going to be the internal Ziflow name of the form.
Form URL - you can leave the URL that was automatically generated or enter your own custom URL.
Submitter validation - by validating an email, you may allow people to create new proof versions via the Intake form. Once this option is checked, people submitting new proofs will be asked to authenticate themselves using an email address. They then can submit new versions of proofs they've already created.

Title - the intake form title is visible to all people who open the form.
Description - enter a description of the form.
On-submission text - this is what will display after the proof is submitted.
Branding (Pro & Enterprise editions only) - choose the branding that should be applied to the intake form. There are three options to choose from: My branding (account settings), Ziflow branding (default Ziflow settings), and Other branding (lets you customize).
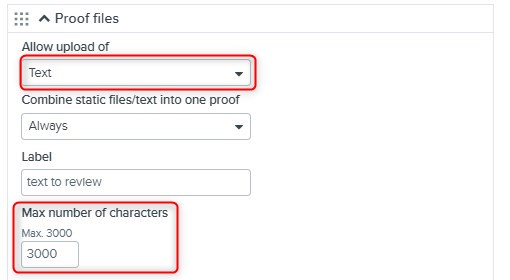
Allow upload of - lets you decide what type of files are allowed to be uploaded. You can decide to allow uploading: files, websites, or text. If you allow your clients to upload text, you can additionality set a maximum number of characters limit.

Combine static/text into one proof - lets you decide if multiple files uploaded to the form should be combined into one proof.
Proof name - choose how the proof name should be determined: use the file name, allow users to name the proof, or customize the proof name using built-in tokens.
Add property - this option allows you to add custom-proof properties if they are active in your Ziflow account. Please note that the User field type cannot be added as a Property in the Intake form. Custom properties in Intake Forms can only be added on Enterprise Edition.
Please note that properties entered while submitting an intake form will overwrite properties saved inside the Intake form Zibot.

Add section - by adding sections, you can create headers for your intake form. Once those sections are added, you may group properties together.

At this point, an intake form has been created and is active, but to develop proofs from the files submitted through it, we must build a Zibot. The automated Zibot will automatically generate proofs whenever someone uploads a new file via the intake form.
Intake form Zibot
The Intake Form Zibot creation process looks exactly the same way as any other Ziflow Zibot. Here’s an article showing how to set up a new flow, but we will also show how this looks step by step. What is worth noting is that only users with "Admin" rights can set up Intake Form Zibots.
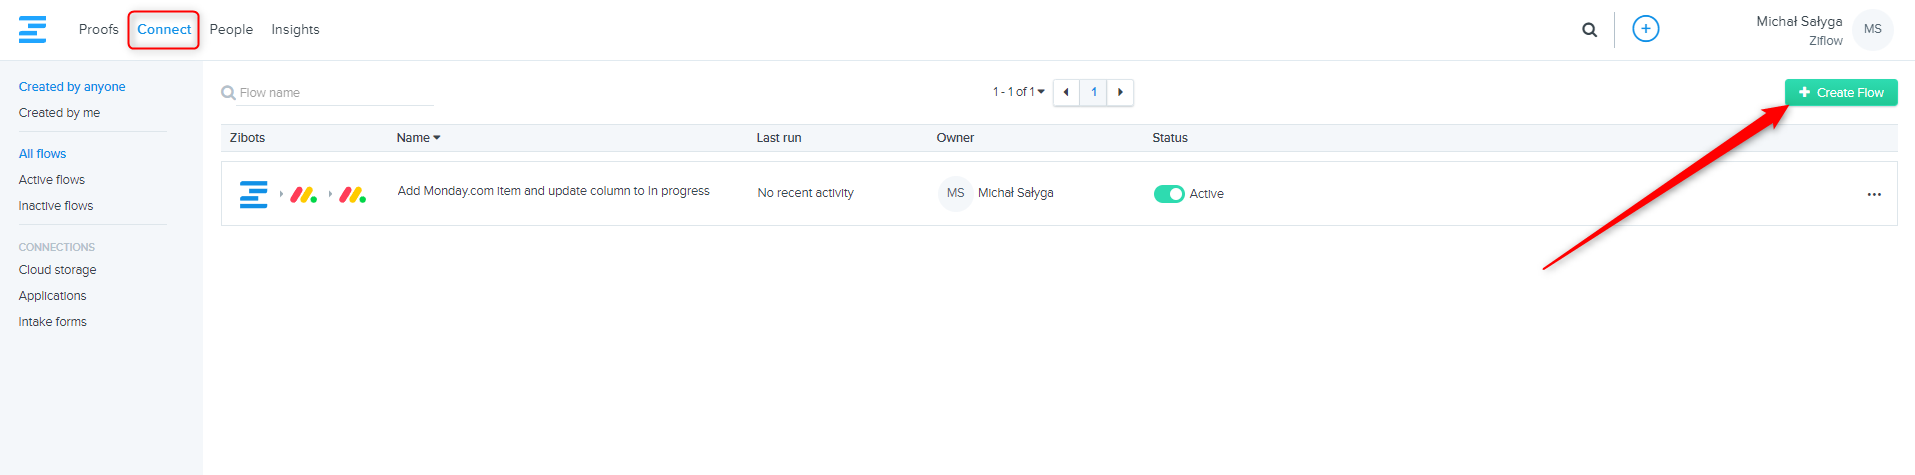
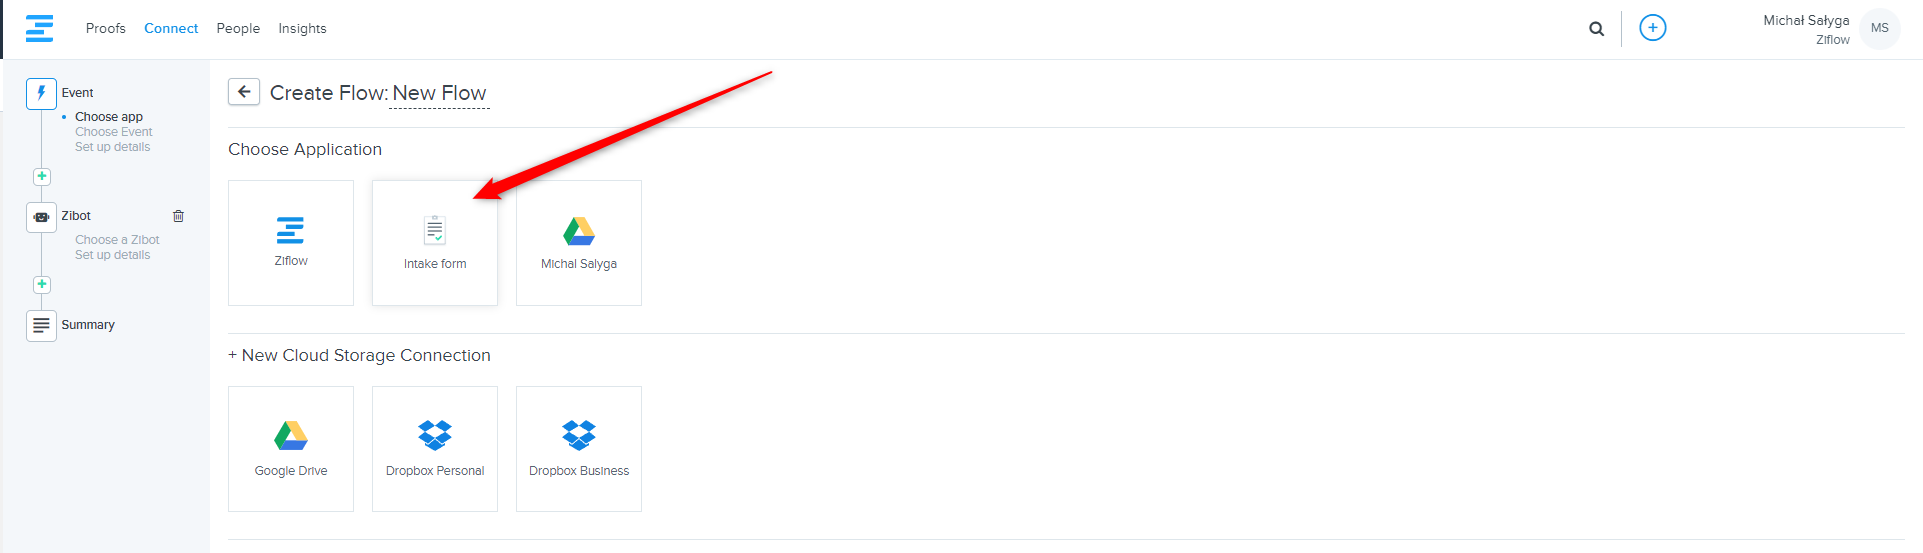
You start by clicking on the Create flow button inside the Connect tab:
To proceed, you need to choose an Intake form as your application.
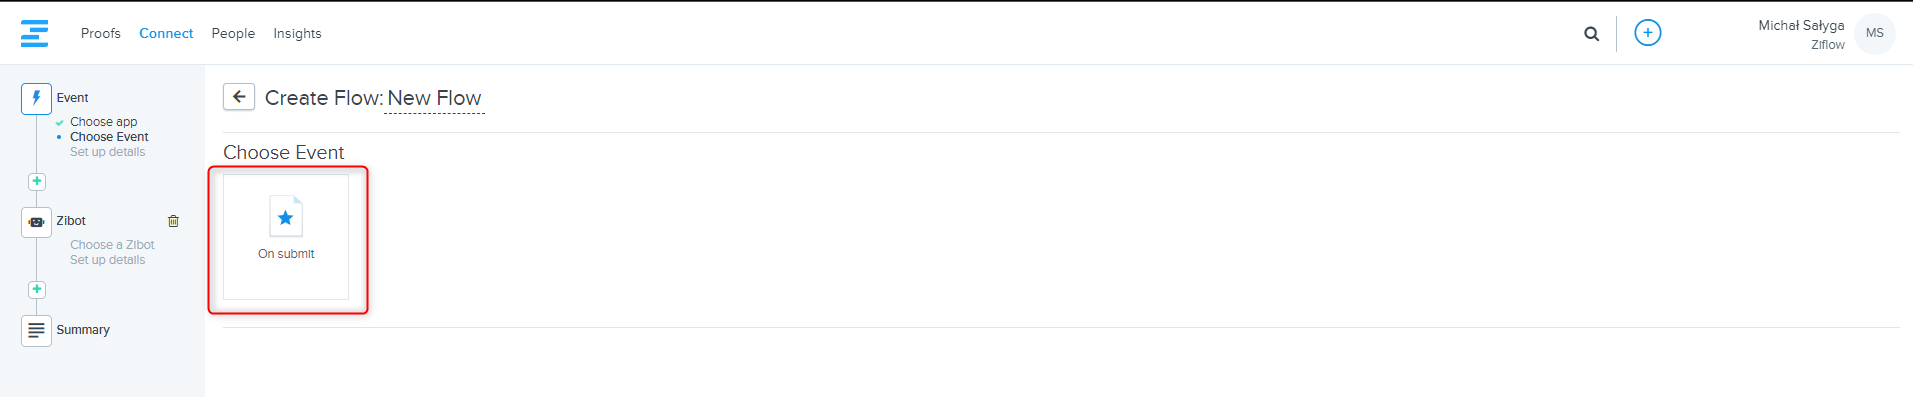
Select the On submit option as the event.
At this point, you need to choose from the list which intake form should be connected to the Zibot (alternatively, you can also create an intake form from this level):

Once you’re done with the event configuration, you can proceed to set up an actual Zibot that is going to create proofs:
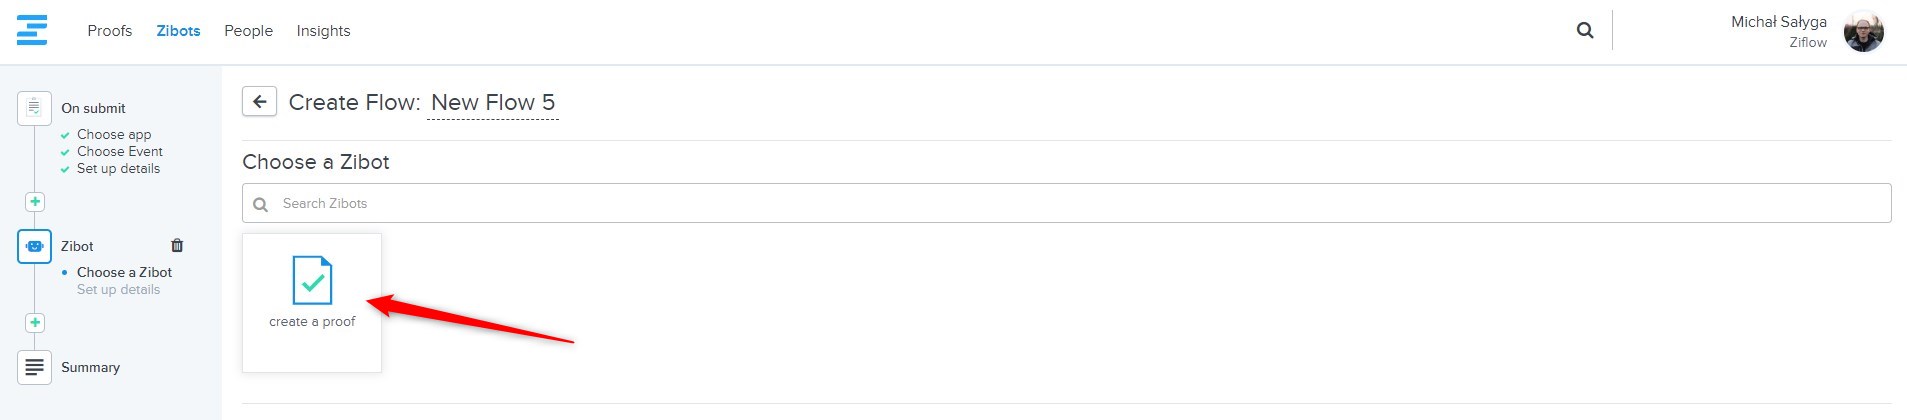
Our next step will be selecting Create proof Zibot and proof configuration: building a workflow, adding reviewers, adjusting proof settings etc. If you need more details on the proof workflow settings, you can visit Creating a new proof article.

When you’re done, click the Next button, and you will be asked to confirm if the flow should be saved and activated. You can also name the flow so it is easier to differentiate it from other automation.
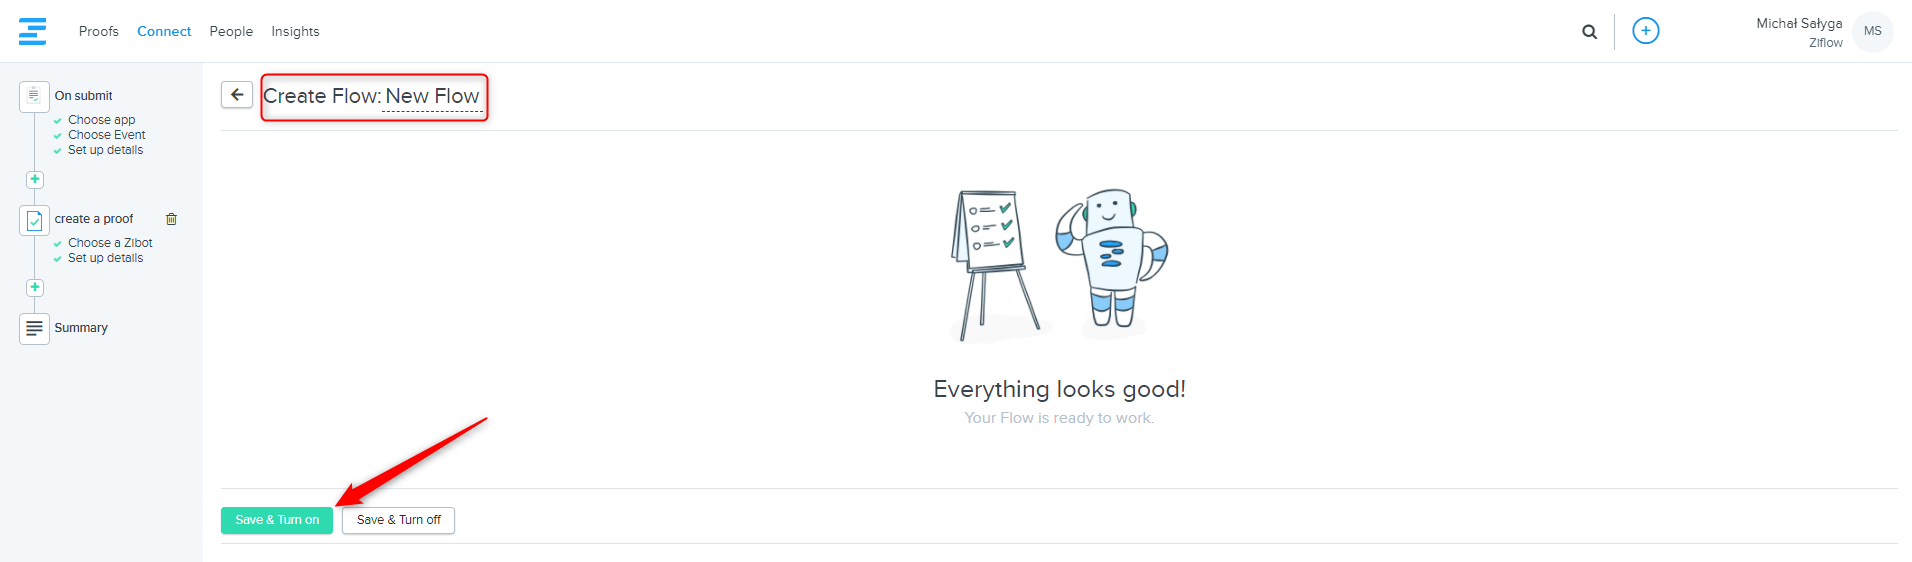
After saving the Zibot, the process is finished. Users can start submitting files through the intake form. A proof will automatically be created whenever someone uploads a file through the form.

Create new versions through intake forms.
To allow you to submit new proof versions through intake forms, please make sure to enable two settings on the intake form that you want this feature to be enabled.

Enabling this setting will allow intake submitters to upload a new proof version. When

Flow owners can also decide how new proof versions work when the original proof workflow is changed manually after the proof is created. This can be achieved by selecting a special setting while configuring Create Proof Zibot while setting up an intake flow.

With this setting enabled when creating new proof versions using an intake form, Ziflow will pull settings and details from the previous version (and not from the original workflow details). Let's say your client initiated proof using an intake form. The flow creates the proof, but the proof owner manually adds a new reviewer to the proof workflow.
Later, when a new version is added using the same intake form & flow, then the new version will inherit all settings & reviewers from the previous (V1) version (including manually added reviewer after proof creation).
Additional information:
Please note that properties entered/selected while submitting an intake form will overwrite properties saved inside the Intake form Zibot.
Intake Forms can also be used when uploading different media types into a single proof. Read more about the Batch review feature in Ziflow.
