
Summary: The Proof Zibot can be used in a single flow or as part of a multi-step flow. This Zibot will automatically create proofs every time someone uploads files through the Intake form or to the Google Drive/Dropbox folder.
Where is the feature setup? The Create Proof Zibot can be applied inside the Zibot step when creating or amending a Flow.
How does it work?
**NOTE - you must first connect your cloud storage (Dropbox or Google Drive) before creating a flow. You can do this under the Connect tab -> Cloud Storage. If you need a detailed guide on how to connect with your cloud storage, please visit this website.
Available: on Pro, Business Legacy, and Enterprise editions.
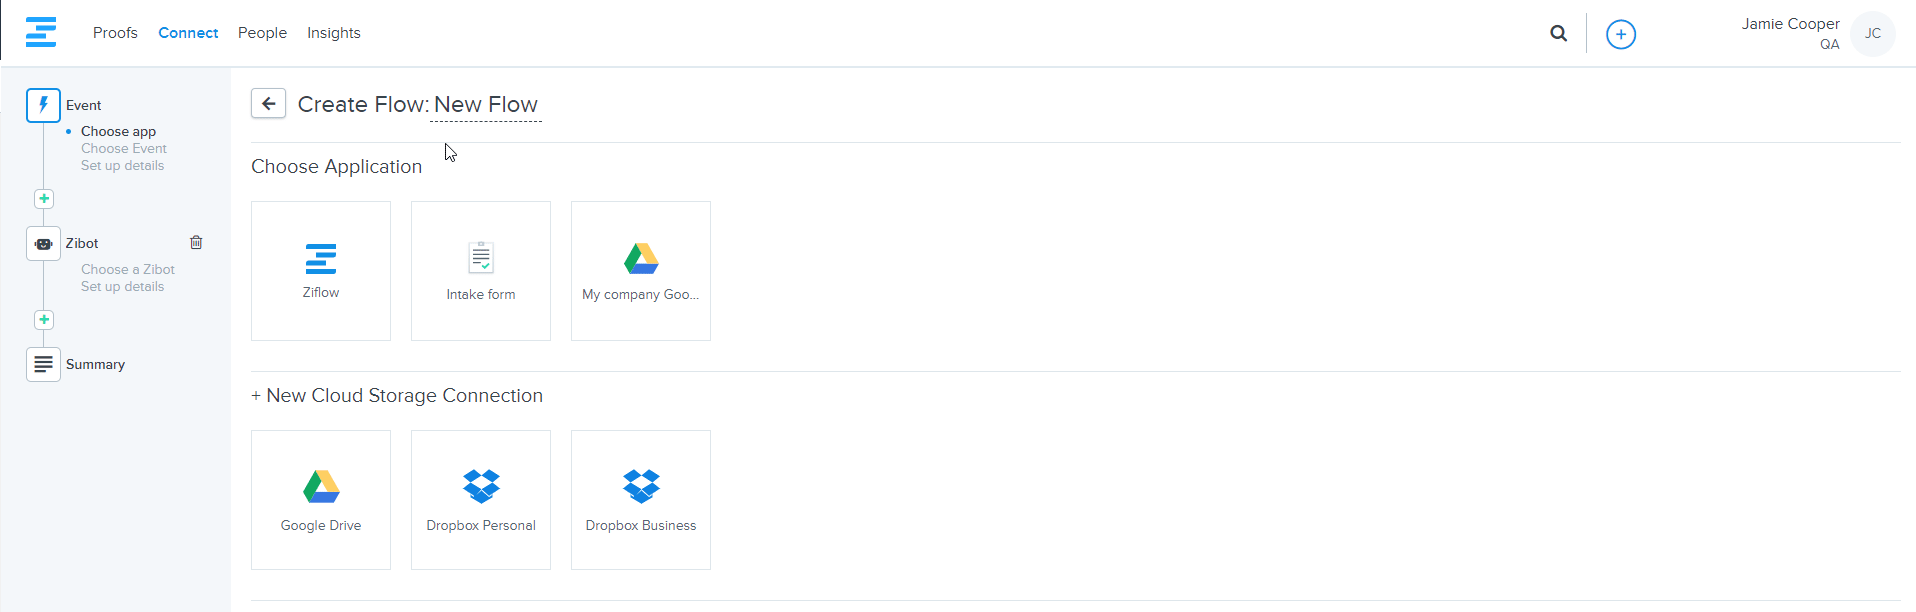
Start by entering the Connect tab and pressing the Create flow button in the dashboard's upper right corner.

Name your flow and select previously added cloud storage connection**. Alternatively, you can also add a new cloud connection from this page.
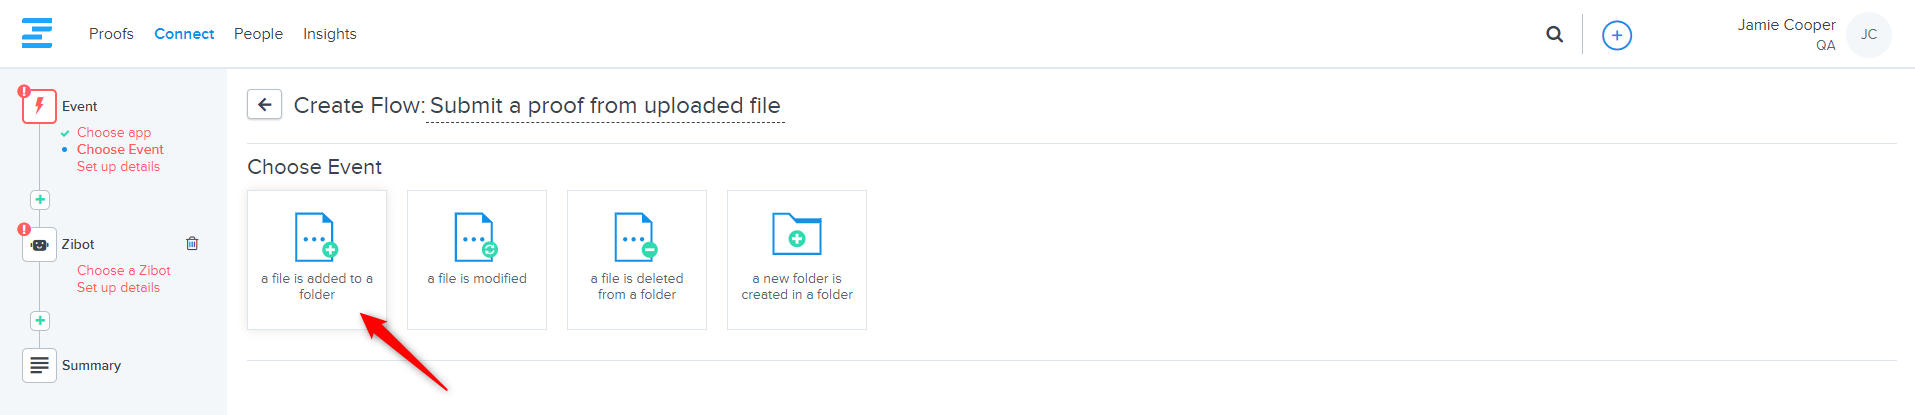
Next, choose the event that will trigger your Zibot. In this, I’m choosing “a file is added to a folder”.
Right now, you're going to Set up details for your event. Please see "Understanding event settings" for more information.
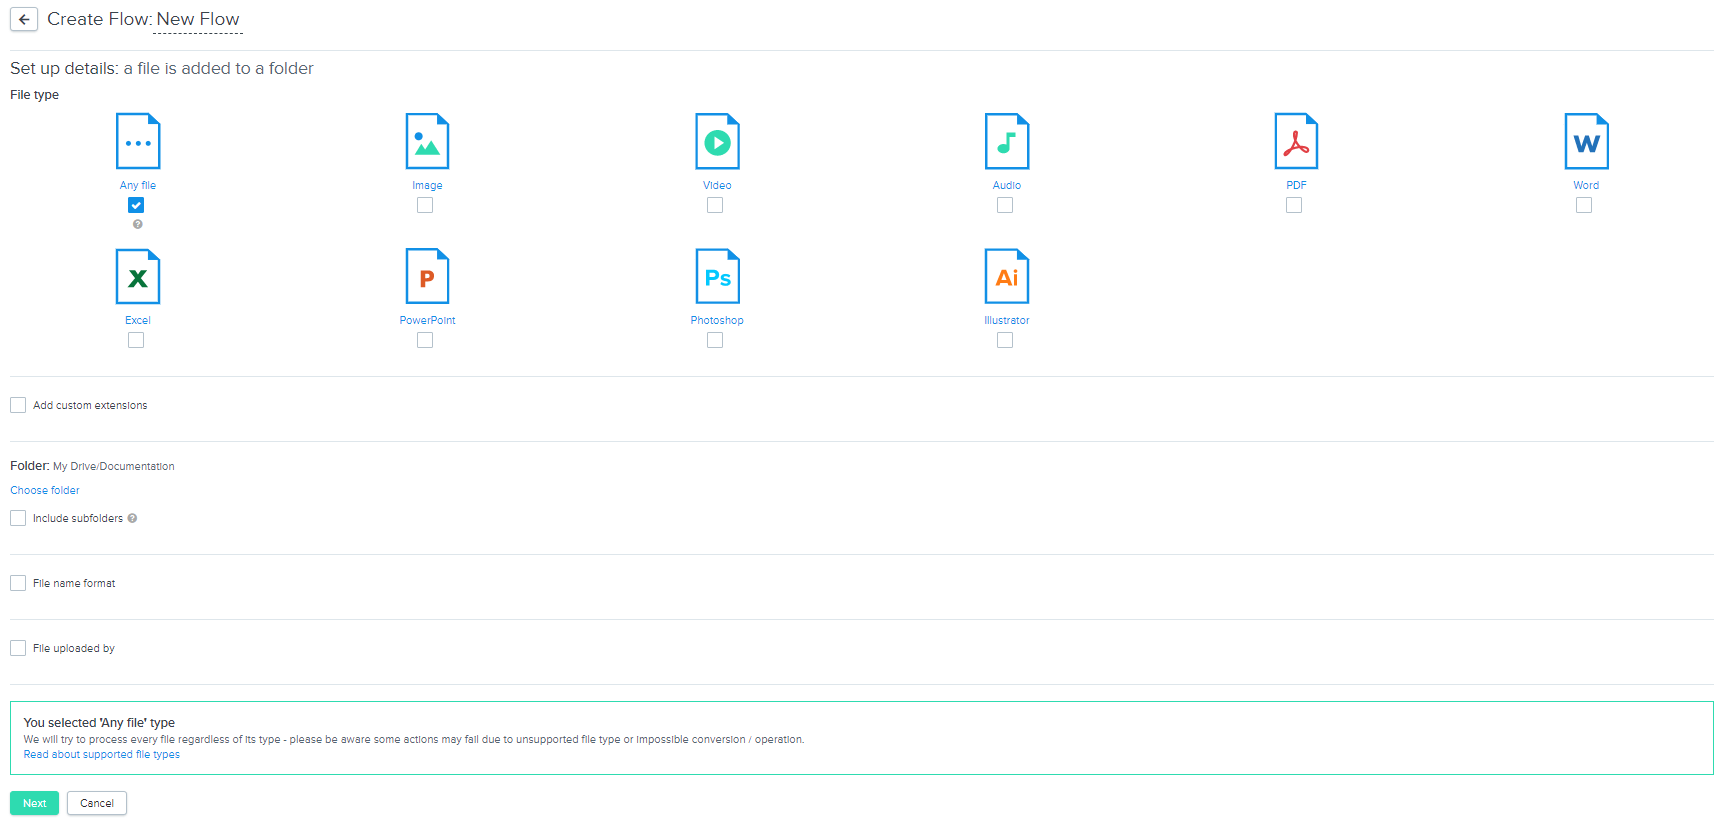
The settings above let you narrow down files that will trigger the automation later on. You can decide which files, uploaded, where, and by whom will trigger later actions.
Once you're done with adjusting the trigger settings, click the Next button and proceed with the Zibot configuration.
You'll be presented with a list of available Zibots, select Create a proof Zibot. When you select the Proof Zibot as part of your flow, you will see a standard proof creation screen where you’ll need to configure all the settings (proof folder, reviewers, proof settings etc). If you need more details on the proof workflow settings, please visit Creating a new proof article.

At this moment, the flow is ready for use. You can drop a file in your cloud drive and see how Flow picks it up and submits a new proof.
